
Oracle Enterprise Manager 13c Release 5 (13.5) Installation on Linux 7
Step-by-step guide to installing OEM 13c Release 5 on Linux 7.
Let's look at deploying OEM 13.5 on top of Linux 7. First we will install Oracle 19c which will act as Repository database. We will be looking at both GUI as well as silent method of deploying OEM 13.5
Server Prerequisites
Update the /etc/hosts file and make sure the server IP address, hostname entry is available
vi /etc/hosts

37.27.193.142	aks50.dbagenesis.com		aks50
Open required linux ports which will allow you to connect cloud console from anywhere
firewall-cmd --permanent --add-port={80,443,1521,3872,4889,4903,7102,7202,7301,7403,7788,7803,9788,9851}/tcp

firewall-cmd --reload
Install Oracle 19c pre-install package along with other packages that are required by OEM
yum install -y oracle-database-preinstall-19c

# packages required by OEM
yum install make -y
yum install binutils -y
yum install gcc -y
yum install libaio -y
yum install glibc-common -y
yum install libstdc++ -y
yum install sysstat -y
yum install glibc -y
yum install glibc-devel.i686 -y
yum install glibc-devel -y
yum install libXtst -y
Create necessary directories that will hold Oracle 19c database and OMS
mkdir -p /u01/app/oracle/product/19.3/db_home
mkdir -p /u01/app/oracle/middleware
mkdir -p /u01/app/oracle/agent

# give ownership and permission to oracle user
chown -R oracle:oinstall /u01
chmod -R 775 /u01
Setup Oracle user bash_profile
su - oracle
vi .bash_profile
Delete all and paste below. Make sure to change environment variables according to your environment
# .bash_profile

# Get the aliases and functions
if [ -f ~/.bashrc ]; then
	. ~/.bashrc
fi

# User specific environment and startup programs

export ORACLE_SID=OEMDB
export ORACLE_BASE=/u01/app/oracle
export ORACLE_HOME=/u01/app/oracle/product/19.3/db_home
export OMS_HOME=/u01/app/oracle/middleware
export AGENT_HOME=/u01/app/oracle/agent/agent_inst

PATH=$PATH:$HOME/.local/bin:$ORACLE_HOME/bin

export PATH
Export bash profile
. .bash_profileSetup 19c Repository Database
The first step is to install and configure Oracle 19c which will act as Oracle Management Repository. Here are the quick steps to install Oracle 19c in silent mode as oracle user
# download and unzip 19c software
cd $ORACLE_HOME
unzip LINUX.X64_193000_db_home.zip

# for silent installation
./runInstaller -ignorePrereq -waitforcompletion -silent      \
-responseFile ${ORACLE_HOME}/install/response/db_install.rsp \
oracle.install.option=INSTALL_DB_SWONLY                      \
ORACLE_HOSTNAME=${HOSTNAME}                                  \
UNIX_GROUP_NAME=oinstall                                     \
INVENTORY_LOCATION=/u01/app/oraInventory                     \
SELECTED_LANGUAGES=en,en_GB                                  \
ORACLE_HOME=${ORACLE_HOME}                                   \
ORACLE_BASE=${ORACLE_BASE}                                   \
oracle.install.db.InstallEdition=EE                          \
oracle.install.db.OSDBA_GROUP=dba                            \
oracle.install.db.OSBACKUPDBA_GROUP=dba                      \
oracle.install.db.OSDGDBA_GROUP=dba                          \
oracle.install.db.OSKMDBA_GROUP=dba                          \
oracle.install.db.OSRACDBA_GROUP=dba                         \
SECURITY_UPDATES_VIA_MYORACLESUPPORT=false                   \
DECLINE_SECURITY_UPDATES=true
Once you have Oracle 19c installed, next is create a container database using dbca and one pluggable database which will host repository
dbca -silent -createDatabase                            \
     -templateName General_Purpose.dbc                  \
     -gdbname ${ORACLE_SID} -sid  ${ORACLE_SID}         \
     -characterSet AL32UTF8                             \
     -sysPassword enterCDB#123                          \
     -systemPassword enterCDB#123                       \
     -createAsContainerDatabase true                    \
     -totalMemory 2000                                  \
     -storageType FS                                    \
     -datafileDestination /u01/${ORACLE_SID}            \
     -emConfiguration NONE                              \
     -numberOfPDBs 1                                    \
     -pdbName OEMREPO                                   \
     -pdbAdminPassword enterPDB#123                     \
     -ignorePreReqs
Start the listener so that OEM can connect the repository database
lsnrctl start listenerConnect to the OEMDB and set below mandatory parameters
alter pluggable database OEMREPO save state;
alter system set "_allow_insert_with_update_check"=true;
alter system set session_cached_cursors=200 scope=spfile;
alter system set sga_target=800M scope=both;
alter system set pga_aggregate_target=450M scope=both;
It's good to bounce DB once
shut immediate;
startup;
Download OEM 13.5 zip files (there will be 5 zip files). Do not unzip those files, the OEM installer will auto-extract those files. Once the files are downloaded, you can start OEM installation in GUI or Silent Mode.
OEM GUI Mode Installation
You can directly start OEM graphical installation by
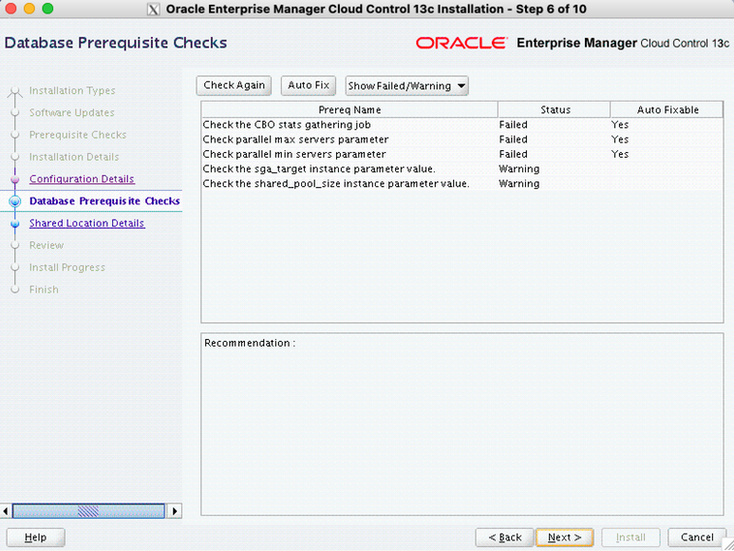
./em13500_linux64.binAnd follow the on-screen instructions as below. The installation generally takes around 2 to 4 hours, so be patient


OEM Silent Mode Installation
The silent method is the most preferred method by experienced DBAs. First we create a response file with below parameters
vi /tmp/oemInstall.rsp

RESPONSEFILE_VERSION=2.2.1.0.0
UNIX_GROUP_NAME=oinstall
INVENTORY_LOCATION=/u01/app/oraInventory
SECURITY_UPDATES_VIA_MYORACLESUPPORT=false
DECLINE_SECURITY_UPDATES=true
INSTALL_UPDATES_SELECTION=skip
ORACLE_MIDDLEWARE_HOME_LOCATION=/u01/app/oracle/middleware
ORACLE_HOSTNAME=aks50.dbagenesis.com
AGENT_BASE_DIR=/u01/app/oracle/agent
WLS_ADMIN_SERVER_USERNAME=weblogic
WLS_ADMIN_SERVER_PASSWORD=weblogic12345
WLS_ADMIN_SERVER_CONFIRM_PASSWORD=weblogic12345
NODE_MANAGER_PASSWORD=weblogic12345
NODE_MANAGER_CONFIRM_PASSWORD=weblogic12345
ORACLE_INSTANCE_HOME_LOCATION=/u01/app/oracle/gc_inst
CONFIGURE_ORACLE_SOFTWARE_LIBRARY=true
SOFTWARE_LIBRARY_LOCATION=/u01/app/oracle/swlib
DATABASE_HOSTNAME=aks13.dbagenesis.com
LISTENER_PORT=1521
SERVICENAME_OR_SID=OEMREPO
SYS_PASSWORD=enterCDB#123
SYSMAN_PASSWORD=enterOEM#123
SYSMAN_CONFIRM_PASSWORD=enterOEM#123
DEPLOYMENT_SIZE=SMALL
AGENT_REGISTRATION_PASSWORD=weblogic12345
AGENT_REGISTRATION_CONFIRM_PASSWORD=weblogic12345
PLUGIN_SELECTION={}
b_upgrade=false
EM_INSTALL_TYPE=NOSEED
CONFIGURATION_TYPE=ADVANCED
CONFIGURE_SHARED_LOCATION_BIP=false
MANAGEMENT_TABLESPACE_LOCATION=/u01/OEMDB/OEMREPO/mgmt.dbf
CONFIGURATION_DATA_TABLESPACE_LOCATION=/u01/OEMDB/OEMREPO/mgmt_ecm_depot1.dbf
JVM_DIAGNOSTICS_TABLESPACE_LOCATION=/u01/OEMDB/OEMREPO/mgmt_deepdive.dbf
Initiate the OEM installer by passing above response file
nohup ./em13500_linux64.bin -silent -responseFile /tmp/oemInstall.rsp &This will take around 2 to 4 hours to complete. You can monitor the installation progress via
tail -f nohup.outOnce the installation is completed, run the root script and you should be able to access your cloud console via below link
https://<oem_server_ip>:7803/emLogin with sysman user and password!
Verify OEM Installation
OEM comes with emctl (Enterprise Manager Control Utility) that helps you manage, configure and verify OEM installation. Below commands will provide you with quick info
# to check the status of OMS
$OMS_HOME/bin/emctl status oms

# to check in detailed OMS status
$OMS_HOME/bin/emctl status oms -details

# to check repository details
$OMS_HOME/bin/emctl config oms -list_repos_details
The same emctl utility is available to manage Agent
# to verify agent current status
$AGENT_HOME/bin/emctl status agent

# to get list of targets monitored by agent
$AGENT_HOME/bin/emctl config agent listtargets

# to stop-start agent
$AGENT_HOME/bin/emctl stop agent
$AGENT_HOME/bin/emctl start agent
$AGENT_HOME/bin/emctl reload agent
Stop/Start OEM Cloud Control
Use below commands to stop OMS, Agent, listener and the database
# stop oms all services
$OMS_HOME/bin/emctl stop oms -all

# stop agent
$AGENT_HOME/bin/emctl stop agent

# stop listener & database
lsnrctl stop listener
sqlplus / as sysdba
SQL> shut immediate;
Use below commands to start listener, database, OMS and Agent
# start listener & database
lsnrctl start listener
sqlplus / as sysdba
SQL> startup;

# start oms
$OMS_HOME/bin/emctl start oms

# start agent
$AGENT_HOME/bin/emctl start agent
With OEM 13c installed, the next logical step is configuring it to monitor database and server targets. Follow our detailed guide on adding a Linux target to Oracle Enterprise Manager Cloud Control 13c.
